There are four ways to merge PDFs on a Mac, and none of them wins every time. Which one makes sense depends on how many files you've got, where they're sitting, and whether you need to shuffle pages around before saving.
Four ways to combine PDFs on a Mac
Here is how the four main tools to merge documents into one PDF on Mac compare in real use.
Method | Preview |
|---|---|
Best for | Combining two or three files on your Mac |
How long | Under a minute |
Where it falls short | Involves manual dragging. Hides the final sequence until you save. Standard saving overwrites your original file. |
Method | Finder |
|---|---|
Best for | Stacks of complete files sitting in the same folder |
How long | A few seconds |
Where it falls short | Takes whole files without page selection. Page order follows your selection order. You only see the result after saving. |
Method | Automator |
|---|---|
Best for | Identical routines you repeat every week |
How long | Ten minutes to build; instant to run |
Where it falls short | Setup takes longer than a one-time merge. The script stays tied to one Mac. |
Method | Merge PDF tool |
|---|---|
Best for | Rearranging and previewing page order before saving |
How long | Under a minute |
Where it falls short | Requires an internet connection. Limits uploads to 12 files per session. |
Read about those four methods below so you can make one PDF from multiple PDFs using the best app.
Combine PDFs with Preview
There are two ways in which you can combine PDF files into one document in Preview, but people tend to confuse them. That mix-up is what causes pages to land in the wrong spot.
Before combining files, duplicate each original PDF you want to keep by choosing File > Duplicate. Preview saves changes automatically, so the export as PDF afterward won't protect your original files from changes made during the process.
Merge two whole PDFs
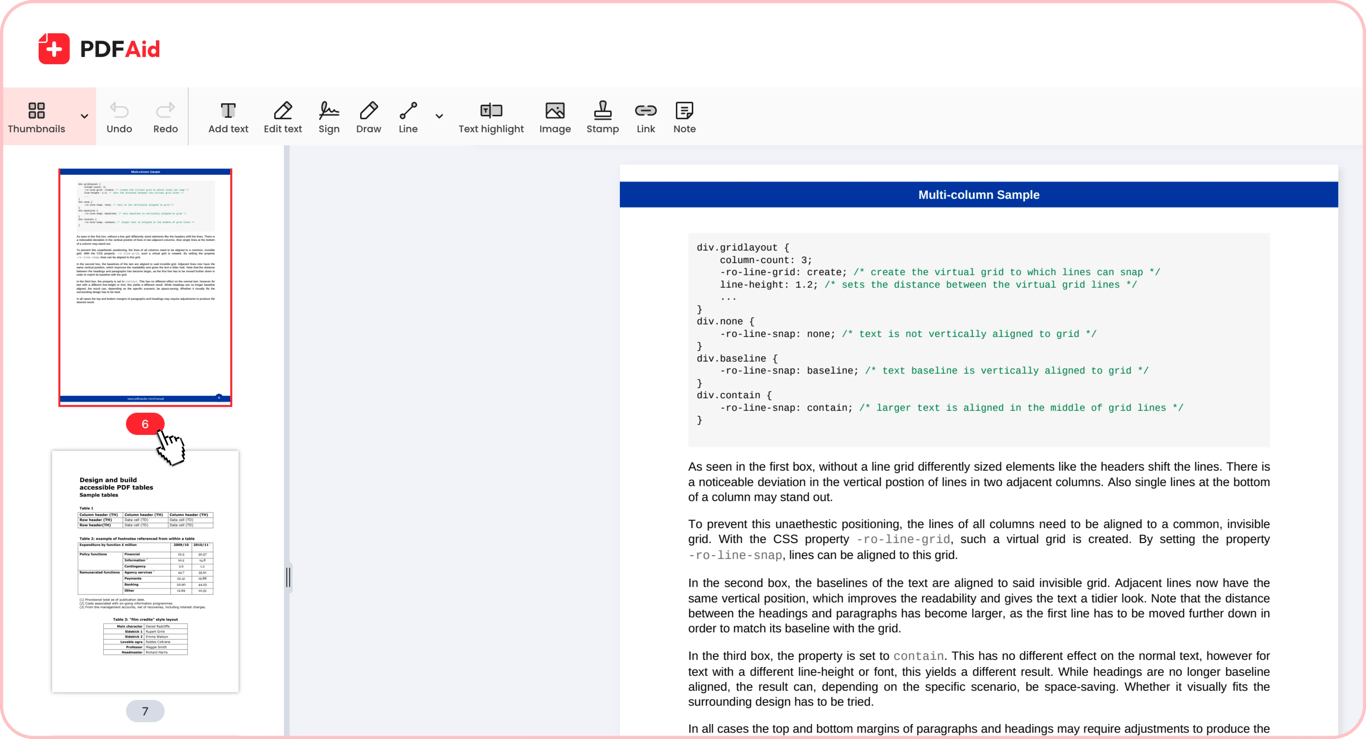
Step 1. Open your document in Preview and click View > Thumbnails to open the sidebar so you can see all your pages as mini previews. Take the second file from Finder and drop it into the thumbnail sidebar.
Step 2. Click the thumbnail that should sit right before the new document.
Step 3. Go to Edit > Insert Page from File..., select your second PDF, and click Open.
There is one thing about Preview that surprises a lot of people. New pages that you add from another file don't go to the end. They land right after whichever page you've selected. Click page 3, import your file, and it slots in between 3 and 4. Do you need them to appear at the very end? Scroll down, click the last thumbnail first, then import.
Add only some pages from another PDF
If you want to add some specific pages into a document, use the second option:
Step 1. Open both PDF files in separate Preview windows.
Step 2. In each window, click View > Thumbnails to show the sidebars.
Step 3. Press and hold the Command key and click on each thumbnail of a page you would like to move.
Step 4. Drag the selected pages into the sidebar of the final document, then drop them where the divider line appears.
Look at how these two methods are different. Method 1 imports a full file without opening it. Method 2 lets you extract and move specific pages between two active windows.
Where it falls short
Inserting files manually: Inserting each file by hand is time-consuming.
No preview of the final order: There's no way to see the full page order in one layout before the save.
Standard save overwrites your source file: Clicking regular save permanently replaces your starting document. If you forget to choose "Export as PDF," your original file is gone.
Two confusing modes: Switching between inserting files from disk and dragging thumbnails across windows is easy to mix up. That confusion often leads to pages landing in the wrong spot.
No control over size or quality: Preview does not include tools to compress your file or adjust export settings. You cannot change settings to balance clear visual quality with a smaller file size.
Interactive elements break: Fillable form fields, digital signatures, web links, and bookmarks typically stop working after a merge. They can stop working, so you need to test the finished document.
Combine PDFs straight from Finder
Finder is macOS's default file manager and system app. You already use it to organize your folders, but it can also merge documents.
How to combine PDFs with Finder
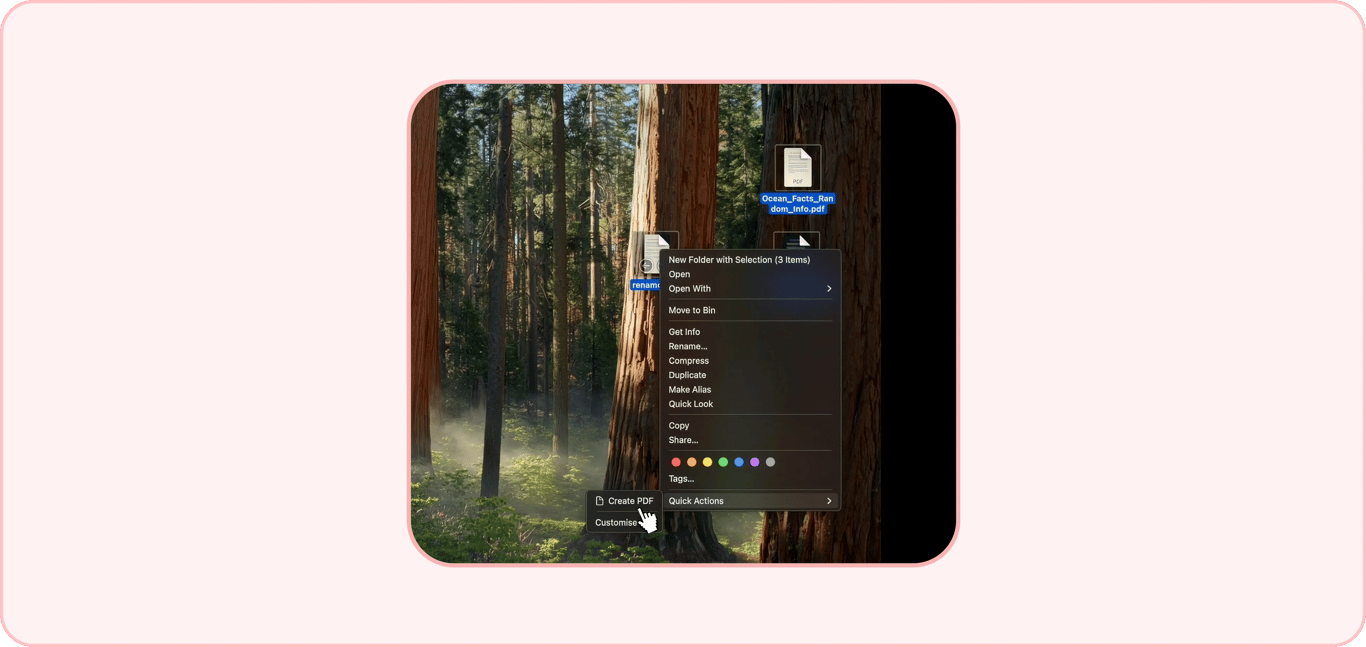
If you know how to make multiple files into one PDF on Mac in Finder, you don't need to open another program. Finder has one quick method to combine files if your PDFs are already in one folder:
Hold down Command
Click each file in the order you want the pages to appear. Finder creates the PDF in the order in which you clicked, not alphabetically
Right-click, choose Quick Actions, and hit Create PDF.
The combined file appears in the same folder, named after the first file you picked. Remember to rename it right away, or it'll get lost among the originals.
Where it falls short
Click order is page order: Finder ignores file names and alphabetization. Whatever you click first becomes page one.
No preview: You see nothing until the file is generated. If the order is wrong, you delete the result and start again.
Whole files only: Finder takes each file as it is, so you can't skip pages or grab just one section.
Order cannot be adjusted during the merge: Rearranging means opening the finished PDF in another app.
Everything in one folder: The files have to be on your Mac in the same place.
Combine PDFs with Automator
Automator comes built into macOS, and Apple's newer Shortcuts app also automates PDF jobs. The main job of these two is handling repetitive chores without making you write code. It's overkill for a one-off merge and pays off for weekly ones.
How to combine PDFs with Automator
You don't have to drag pages by hand every week; put in the time to set up a workflow and do it once. In Automator, start a new workflow and use the “Combine PDF Pages” action. Select your output folder and save the entire thing as an app or Quick Action. Now you can combine multiple files into a single PDF on your Mac with one click.
If you want to go deeper, use AppleScript or shell commands. For example, make a simple script to stamp the file with today's date, sort pages chronologically, or drop the result into a shared team folder.
Where it falls short
High initial setup time: Setting up and testing a workflow takes ten to fifteen minutes. That's a waste of time for a one-time merge.
Clunky interface and unnoticed errors: Automator shows errors when you run the workflow in the app; a Quick Action run from Finder can fail without a visible message.
Rigid output destination: The script always puts the new file into the folder you picked during setup. If you sort files into different client folders every day, this won't work for you.
Tied to a single computer: The script lives in your local library. It doesn't sync to other Macs by itself.
Updates can break your script: MacOS updates sometimes change permissions and script rules, which can break your setup.
Lack of visual confirmation: Before saving, you are unable to check formatting or preview page order.
Combine PDFs with the Merge PDF tool
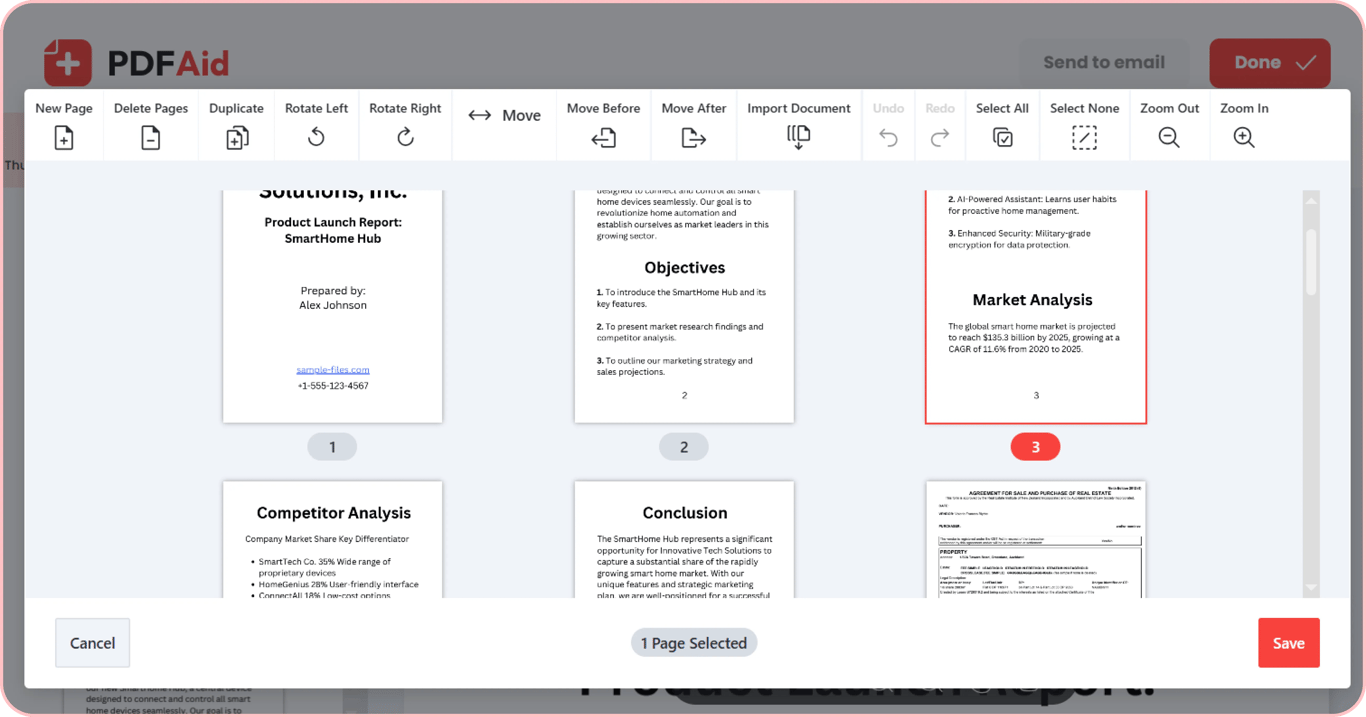
The online Merge PDF tool by PDFAid runs right in your browser, so you are not tied to your Mac. The built-in system tools just combine the files and then create a file. Here, you get a visual canvas first. You can see all pages before merging and fix the layout on screen.
How to combine PDFs with the Merge PDF tool
Want control of each page? Here’s how to merge PDF documents on Mac:
Step 1. Upload your files. Drag and drop files from your desktop or Cloud drive, up to 12 at a time, then click Upload to merge. Next, choose Merge files.
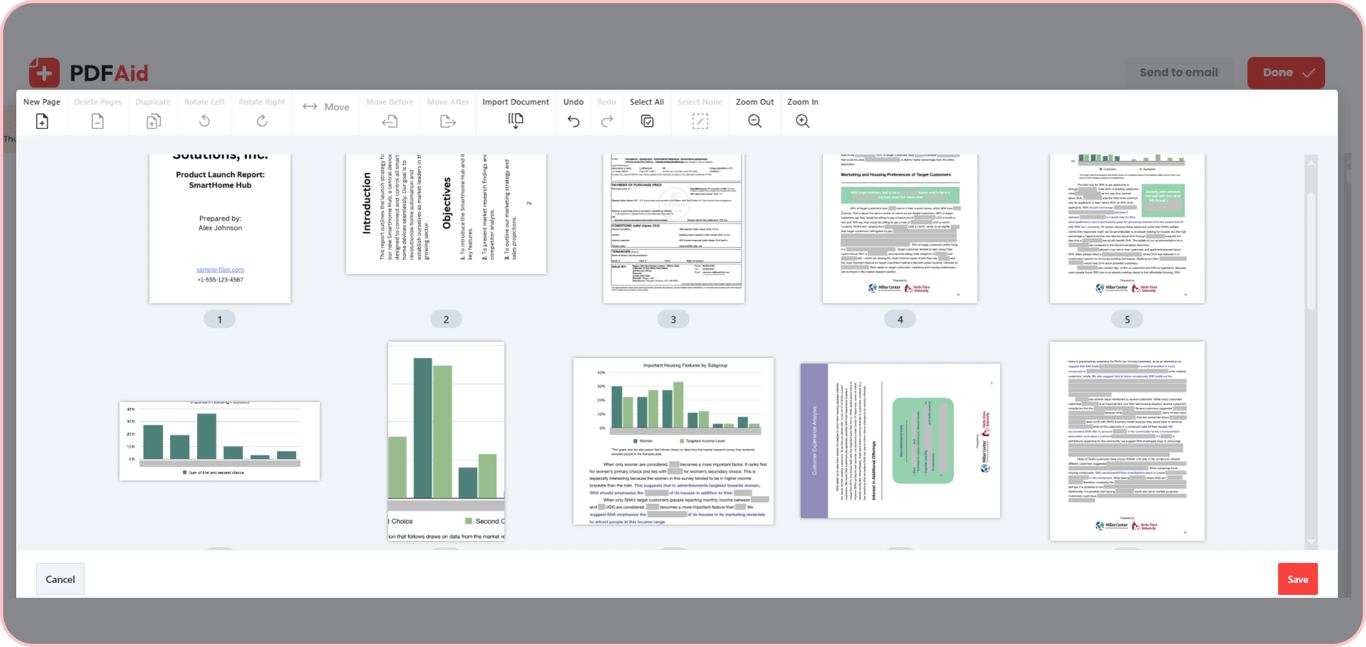
Step 2. Arrange the pages. You can open Manage pages and then drag the thumbnails into place. Before saving, you can rotate or delete pages.
Step 3. Save and download. Click Save. The file is still open in the editor, so you can still sign, compress, or make quick edits. Then click Done, choose the file type, and name it.
When this is the better choice
Your files are scattered across cloud storage and several folders;
Page order matters, and you want to check every page before saving;
You need only certain pages, not whole documents;
You're using an office desktop, a borrowed laptop, or your phone;
You want to sign, compress, or convert the result to Word or JPG right after merging.
Where it falls short
Needs internet. Processing happens online, so you cannot use it without an active connection.
12 files per batch. To add more, upload them in another batch.
100 MB limit. Huge uncompressed scans need to be shrunk first.
Scan several pages into one PDF on a Mac
Maybe you're dealing with paper receipts, handwritten notes, or raw photo scans instead. Here is how to scan multiple pages into one PDF on Mac with the Preview app.
Step 1. Use a scanner or Image Capture to get scans.
Step 2. Select your scanned images in Finder, right-click, and open them in Preview.
Step 3. In the top menu, go to View > Thumbnails to show the sidebar.
Step 4. Press Command-P to open the print dialog.
Step 5. At the bottom of the window, click the PDF drop-down and choose Save as PDF.
One warning: multi-page scans make the heaviest PDFs, so the result may take up a lot more space than a normal document.
What to check after you merge
Before you send or archive your newly combined file, review 3 areas where merge errors usually hide:
Fields, signatures, and links
Interactive elements break most often during a merge. It is common for digital signatures, bookmarks, fillable forms, and hyperlinks to disappear or become inactive. Form fields, links, and bookmarks can stop working or disappear after a merge, so test them. Also, agreements should always be merged before they are signed. Merging modifies the file structure, which immediately breaks digital certificates and invalidates or erases existing signatures.
If you need to collect electronic signatures, you can set them up with our Sign PDF tool once the layout is set.
Page size and orientation
Your pages won't always match. A standard A4 sheet, a tiny receipt, and a landscape spreadsheet all come in different sizes and orientations. Before you share the file, scroll through it and rotate anything that's sideways or upside down.
Spike in file size
Because every page is a full-resolution image, merged scans can get very big. Most email providers reject attachments above the 25 MB limit. If your finished file is too heavy to send, you can run it through our Compress PDF tool. With it, you can reduce the file size without blurring the text.